Sunday, November 18, 2012

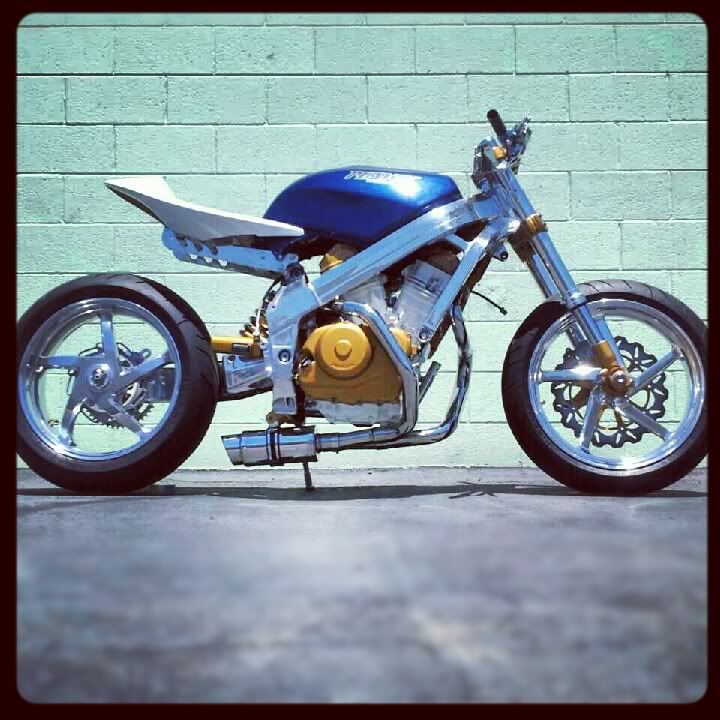
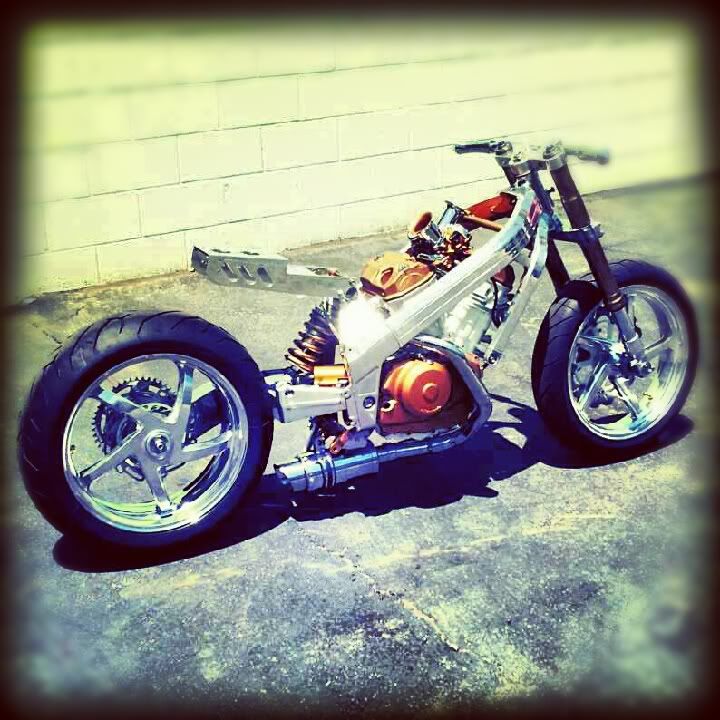
Out in the sun...

Such a beautiful day... I had to roll her out under the sun and take better pictures!


I also decided to fabricate a bracket to hold my Mikuni fuel pump. I made a really simple design... 6 screws, 4 bolts, spacer with an attached washer and a bar of aluminium.  

 This is the spacer with an attached washer. It was a part for my stock rear seat. But since I'm doing a Monster seat conversion, I won't be needing it for the seat.

All the piece, except two screws... I was so excited I didn't even line the holes up right. You can't really tell when its all mounted up.

The rough fitting of all the parts with fuel pump.

All painted and mounted! All I need is the fuel lines. 

I'm glad I was able to get something done on the bike today. Tomorrow I'll be working on the exhaust and master rear brake. Have a wonderful day!


Friday, November 16, 2012

It's coming together slooooowly...

Just a quick update for you... I did a little this and that... Sad thing is, you won't be able to see the details of the engine with the tank on it. Maybe with a tank made out of plexi-glass! LoL.

Here is a shot with the carbs attached... 

Stator and Clutch Cover getting the same treatment 
 

Also, did a rebuild of the rear brake caliper... Gave it a little paint to match the bike.

SS Braid-line is just a mock up... but I have it running thru the swing-arm for a cleaner look.  

Another angle...

Friday, November 9, 2012

Conversion to save money...

A real quick post.

Back when I lived in Hawaii, A good friend of mine sold me his 1994 CBR600 F2 race bike for a cool $600. It never saw the road just the track. Everything geared for racing. I rode it on the race track and had some fun. A couple years later, I moved to California and it ended up sitting in my garage collecting dust. It wasn't street legal and too much work to get it there. So slowly, I ended up selling parts off the bike to fund another project which was my BMW 740iL. Unfortunately, short after everything was upgraded, it got totalled. (That's another long story)

Today, I still have parts of the bike I didn't sell and one part that I still have is a rear Fox Shock Twin-Clicker. It is a bit small for my bike, so I need to get some minor adjustments which I'm not qualified to do. I ask the guys on the HawkGT Forum if they can recommend a company to do the conversion. I got several responses I didn't want to hear, except for one. A member sent me a private message to see if I wanted to trade for his CBR900 Fox Shock. It was the perfect size to do the conversion. I know because many other guys on the forum had already done it with this model shock and you better believe I didn't hesitate to say, "YES".

Unfortunately, I don't have a picture of the exact shock because it went straight to his shock guy (whoever that may be), but it looks identical to the one I have. Only difference is this one is 12mm shorter than the other. It may not seem much, but its enough to throw the suspension off a bit.


It's going to take a couple of weeks for it to be completed... In the meantime, I'll just have to work on something else. Maybe paint the stator and clutch cover. Which reminds me... I have to order more parts for JD. The master Hawk mechanic on the forum. Also owns Hord Power out in Ohio.

Monday, October 29, 2012

Getting my grind on...

Ah... its that time... time to prep the subframe aka "subbie". I thought long and hard about doing this modification. I was torn from keeping my subbie stock or grinding it up for the monster seat mod. It didn't take me long to say... "I'm going to do it! and if I mess things up, I'll by another one off ebay." I just love the look of the monster seat. It really updates the look of the Hawkster. A few HawkGTforum.com members Hawk's that influenced me in making my decision.


Don't the look sweet! Well, I think they do. It really didn't take me long to grind down all the unnecessary tabs and brackets. Just a ton of hot little sparks from all the grinding. The finished look of the stock subbie all grinded down.


Now I just have to find some material to complete the subbie for the new seat. 


Thursday, October 25, 2012

The Hawkster is taking shape...

Since my graduation... I've had lots of time on my hands. A project that was almost forgotten is now back on track. Until the day another life changing event alters my attention to something else. But since that hasn't happen yet... it's all about the Hawkster.

The last few days... I was able to start the assembly. It feels so good to see your hard work take shape. First on the list was putting the valve covers back on. I pulled out the polisher and polished nuts and bolts. (Note: the Stator and Clutch cover will be painted Low Black after I get the bike engine started and running. Then, I'll be able to change the gaskets, clutch and springs.)

Next, I decided to get the frame on... 
Took some skill of not scratching the delicate surface.

Another angle...

 My first thought was... "WOW"

I couldn't stop there... I had more parts that were screaming to be installed. Plus, I was so eager to get to a rolling chassis. Now this next part kick my ass for a bit... but was able to get it on after yelling and screaming at it for 30 minutes. LOL!

It was starting to take shape. Looking like a MOTO!

I do not recommend doing this by yourself... but if your like me and don't have any patience to wait for someone to help you, then by all means go for it. Front forks, front tire and rear tire installed. Thank God I had rear and front stands.

A couple more angles with wheels mounted.

Today, I was able to work on the carburettor (aka carbs for short) and starter. The greatest influence came from the Hawk GT Forum by "grinDAILY". He calls his project "The Phoenix - Rising From the Ashes". After reading his build post (btw his bike is not yet complete), I found inspiration in doing the same to mines but on a low ass budget. LOL! Also without the Bling Bling... Overall, you can see where I get my inspiration from.

grinDAILY's "The Phoenix"
Still UNDER CONSTRUCTION!

Another picture w/out seat and gas tank... one sick ass bike!

Ok... back to my project. Like I said, I was able to work on the carbs... check out the before, progress and after pictures.

Before...

Progress...
Damn look how clean they looked before I sprayed them. But black is much better!

More Progress pictures...
Left-Final coat of black   Right-Waiting for it to completely dry.

After...
Picture of one carb...

 Picture of the completed Carb
Internals of the carbs are on order... 
Jet Kit Stage 3 and Rubber Intake Manifold Carb Holders

  Just an idea of what its going to look like on the bike...

To bad most of it will be covered by the gas tank... 
Does anyone make a plexi-glass gas tank? Hahaha!


Forgot to take pictures of the before on the starter... but here are the afters.
Here's the kicker... I didn't realize I had to put this on before I mounted the engine.
Now I have to drop the engine just to install the starter... 
What a pain in the ass! Lesson learned.

Stay tuned... there is more to come. 
If you have any questions... email me or leave a comment.