Thursday, May 31, 2012

Powerplant facelift...

With the frame nicely painted, I couldn't see myself putting back my oxidized weathered out looking engine back in my sick ass (meaning- awesome) frame that I just painted. So I decided to give it a facelift... that's right... FACELIFT! I'm once again going ghetto painting. 

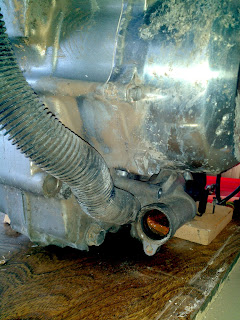
I started off by taking all the parts of the engine that I didn't wanted to get painted. But low and behold... some badness surfaced and I had to deal with it first. 

This is not puddling you'd like to dip your finger in and have a taste... This gunk was sitting in my engine for the past 5 years... Not Good at All, if you ask me.


Can it be possible... its in my water pump too. 

Also, as you can see the engine is very filthy... so a needed blasting was the only way to go before painting.


Yummy... right! 

 Edson... Thanks for helping me out!


Conclusion... call up a friend (Edson M), who is one bad ass mechanic, told me what to do... did it and all is well... hopefully! I can only pray that it starts with no problems once I have everything re-assembled.  

To properly paint the engine, I have to invest in some new toy... I headed to a local store called Harbor Freight and purchased a Blaster Gun and some walnut media. I never used one before, and I must say... I love it! Blasted all the flaking paint off the engine...

 TIP: Cover all the holes up with tape or cloth that you don't want the media going into.
It can be a bitch to get out. Lucky, one of the guys on HawkGTForum.com advised everyone who wanted to go this route. Also, wear protect gear!

 No pictures blasting, but here are the results.

 Used the Rust-Oleum Semi Gloss Black Engine Paint
 Valve covers got a coat of red... Dupli-Color Red Engine Paint

Looks brand new again... Ha!


One side with valve cover


 Finished except for side covers... Stator and Clutch... Not yet sure what color to paint.

Maybe the next time around I can upgrade the engine...

A touch of darkness...

School got the best of me once again... Usually Coleman University does not have a spring break. But lucky me, every four years they have all the student take a week break during the spring so they can reset their academic calendar. Otherwise, session during December will run into Christmas and New Years... I don't think many of the students will be happy if that occurred.

So from May 17th thru the 24th I was able to work on the Hawkster... along with my beautiful assistant (who is also my girlfriend) who has given me support on my bird project. 

Its all about getting ghetto! 

Since, I'm a full-time college student, staying within my budget is a definite priority. I would have loved to powder coat all the parts, but for me to stay on budget, I did the ultimate ghetto style painting. My karate kid technique helped me transform this blinged out frame (which I got tired of polishing over and over again) to a cool ass Vader looking beauty... welcome to the darkside!


My beautiful girlfriend and assistant Dina helping me wipe down the frame prior to paint.


Bye-bye to the Bling!


I used Rust-Oleum Engine Enamel... 
Low Gloss Black
2 Spray cans for  $12 @ Autozone

The Dupli-Color will be for the engine. 
Its is Semi-Gloss Black. $6 @ Pepboys Auto Parts


 There's NO turning back now... nice and steady strokes. First coat, just a light mist of paint... 10 minutes later, Second coat... get it all covered... 30 minutes later... Last and final coat... Give it that wet look, just be careful not to make the paint run.


After 3 coats of paint... "I'm so diggin' the black frame!"

 The swingarm and other nit-bits got the same treatment...

 All painted and sitting in my family room... 
Best place to put them for now. 

Wednesday, May 30, 2012

The transformation begins...

This picture was taken on December 17, 2011


Last year in December, I pulled out my beloved Hawkster from the depths of the forbidden backyard blues. It has been sitting there well over two and a half years. After minutes of starring at it in its decrepit form, I decided to revive her with some love. This will take me on a journey, which I'm hoping it will not last as long as it was sitting. Follow me on my little venture of restoring my Hawkster to a new glory I can enjoy. I'll be posting pictures of my progress to show everyone the slow transformation taking place. And I mean slow... since the only time I have available is when I'm not busy with school.


It took me 5 hours to dismantle the bike to a pile of parts.

Tuesday, May 22, 2012

A brief history...


This sporty little naked bike called the Hawk GT NT650 was totally ahead of its time. It was one of the first modern naked bikes and is often described as a cult bike. Designed by Toshiaki Kishi, it was designated as model RC31. The bike was given a "Pro-Arm" suspension after the RC30 VFR750R. Many of you may compare this bike with the well-known Ducati. Ducati first introduced its first naked bike in 1993 called the Monster, which is still around today. In 1994, they released the Ducati 916. Not only did it have a single sided swingarm it also possessed a V-Twin engine. As you can see, this little bike paved the way!

Specifications:
Manufacturer Honda
Also called Hawk GT, Bros, RC31
Production 1988–1991
Class naked bike
Engine 647cc Four-stroke V-Twin
Transmission 5 speed manual
Wheelbase 56.3 in.
Seat height 30.4 in.
Weight 393 lb. (dry)
412 lb. (wet)
Fuel capacity 2.9 gal

And so my journey begins as I transform my little bike to the bike of my dreams...