Thursday, October 25, 2012

The Hawkster is taking shape...

Since my graduation... I've had lots of time on my hands. A project that was almost forgotten is now back on track. Until the day another life changing event alters my attention to something else. But since that hasn't happen yet... it's all about the Hawkster.

The last few days... I was able to start the assembly. It feels so good to see your hard work take shape. First on the list was putting the valve covers back on. I pulled out the polisher and polished nuts and bolts. (Note: the Stator and Clutch cover will be painted Low Black after I get the bike engine started and running. Then, I'll be able to change the gaskets, clutch and springs.)

Next, I decided to get the frame on... 
Took some skill of not scratching the delicate surface.

Another angle...

 My first thought was... "WOW"

I couldn't stop there... I had more parts that were screaming to be installed. Plus, I was so eager to get to a rolling chassis. Now this next part kick my ass for a bit... but was able to get it on after yelling and screaming at it for 30 minutes. LOL!

It was starting to take shape. Looking like a MOTO!

I do not recommend doing this by yourself... but if your like me and don't have any patience to wait for someone to help you, then by all means go for it. Front forks, front tire and rear tire installed. Thank God I had rear and front stands.

A couple more angles with wheels mounted.

Today, I was able to work on the carburettor (aka carbs for short) and starter. The greatest influence came from the Hawk GT Forum by "grinDAILY". He calls his project "The Phoenix - Rising From the Ashes". After reading his build post (btw his bike is not yet complete), I found inspiration in doing the same to mines but on a low ass budget. LOL! Also without the Bling Bling... Overall, you can see where I get my inspiration from.

grinDAILY's "The Phoenix"
Still UNDER CONSTRUCTION!
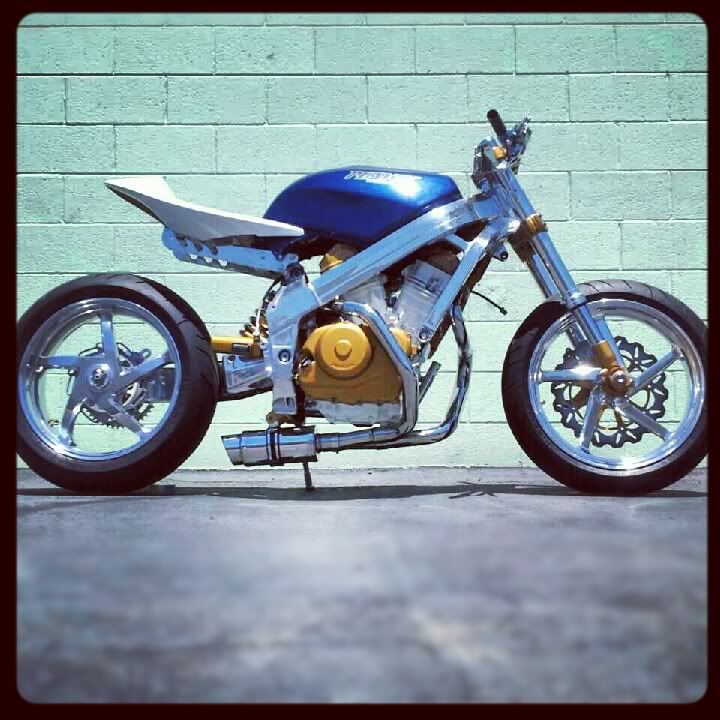
Another picture w/out seat and gas tank... one sick ass bike!
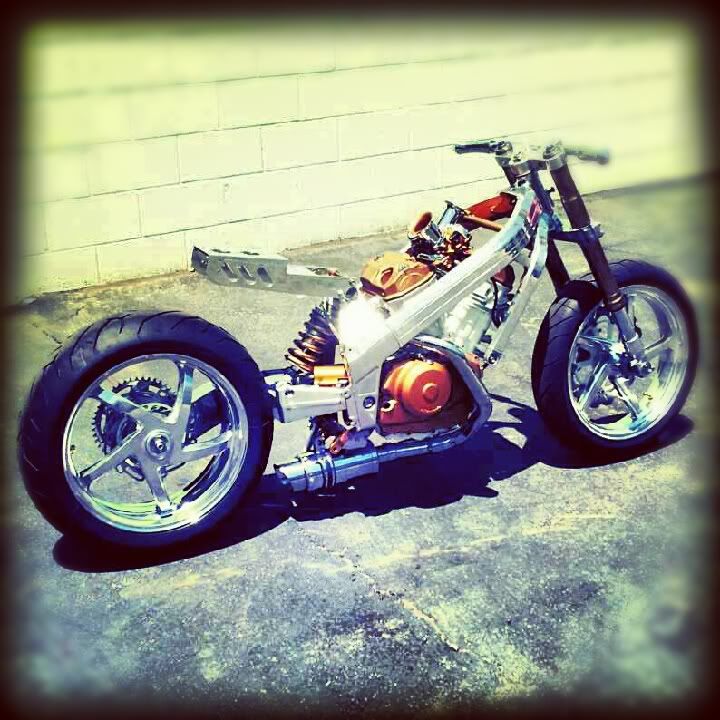
Ok... back to my project. Like I said, I was able to work on the carbs... check out the before, progress and after pictures.

Before...

Progress...
Damn look how clean they looked before I sprayed them. But black is much better!

More Progress pictures...
Left-Final coat of black   Right-Waiting for it to completely dry.

After...
Picture of one carb...

 Picture of the completed Carb
Internals of the carbs are on order... 
Jet Kit Stage 3 and Rubber Intake Manifold Carb Holders

  Just an idea of what its going to look like on the bike...

To bad most of it will be covered by the gas tank... 
Does anyone make a plexi-glass gas tank? Hahaha!


Forgot to take pictures of the before on the starter... but here are the afters.
Here's the kicker... I didn't realize I had to put this on before I mounted the engine.
Now I have to drop the engine just to install the starter... 
What a pain in the ass! Lesson learned.

Stay tuned... there is more to come. 
If you have any questions... email me or leave a comment.


It's all about the BLACK...


On June 9th... I decided to get rid of more of the BLING BLING that I created a long time ago. No more polishing, too much work. I'd rather just wipe it down and go!

I didn't want to pay for the tire removal... was going to cost me $20 per rim.
Are you kidding me. So I just taped it up and BAM!

Front rim all painted... This picture doesn't to it justice. It looks good!
And to think it was sprayed with a can.

Cush Drive got the same treatment.

Some more parts painted low black.

Its coming together slowly... and happy with the results so far.

Getting the mixture just right...

It's been a while since the last time I posted... I've been very busy with school, and I can finally say I graduated with a Bachelor of Science in Computer Networks.


Since then, I have plenty of time to play around with my hawster while looking for a job. Btw... if anyone knows of some in San Diego that can help me out with a job I'd really appreciate it. Now back to the program...

Where do I begin... back on June 7th, I changed my fork oil. I did a mixture of 10w and 15w. I made my own little floating device that tells me when to stop pouring. It worked out great!


My forks were already equipped with Race Tech Springs

Mixing the oils together...

 Old oil from one of the forks... glad I changed it.


And the BAD part is... my pre-load is stuck. I tried everything to get it to turn. 
Damn... I guess I have to pick up another one. 
Do you have one for sale? Contact me please!

Saturday, June 2, 2012

Inspirational Hawks...

Members of the HawkGTForum.com
Inspired me to continue my transformation of my beloved Hawkster...
Velocity B's Hawk 
 Mods:
Entire 600rr front end.
3 Spoke RR front wheel stripped and polished.
Triple modified to accept stock Hawk headlight/mounting hardware.
600rr hand controls wired in.
Vapor Trail Tech digital tach and custom mount.
 
Penske rear shock.
Hiper Form chain roller.
8 spoke VFR rear wheel stripped and polished.
Engine covers & valve covers polished.
Polished Hawk headers.
Frame powder-coated flat black.
Fresh paint on the fenders and tank.
F3 pegs/polished rear-sets.
Odds and ends(turn signals, bar end mirrors) and allot of Ken's elbow grease.


DL2ewpoo's Hawk   
Mods:
F4i Front End
Monster Seat Mod
TBR Headers
Arrow Exhaust
Uni Pod Filters
Stage 3 Jet Kit
Fox Shock
CRG Hindsight Mirrors
Vapor Tach
Adjustable Brake/Clutch Levers
SV650 Fuel Pump
Rear Brake Reservoir Delete
600rr Tail Light
VFR Pegs

LED Gauge Indicators
Flashing Brake Module


Civicious' Hawk
Mods:
700cc Hord-built motor, 84.59hp/55.73tq on MR12
#9 cams
JD's lightweight Wiseco pistons
Carrillo rods
Falicon modded crank
Stage 2 heads
Undercut transmission, everything Nikasil coated
total loss, starter retained
Keihin FCR39's
 stock headpipes, custom collector and stubby R6 can
Hord's lightweight 8-cell battery
HiPerform subframe
F2 front end w/ RaceTech internals, no external adjustment (Hawk fork caps)
ZX10 radial master cylinder
Penske rear
BTT cush drive eliminator/shortened spindle
Masanski's Ducati wheel conversion hub
Brembo mini caliper, Masanski's bracket
etc.


 BTT's Race Hawk  
Mods:
Stock frame,coils,cdi box and starter relay.
Mito tank/Vortex cap and Sunline Vent
Eyepoppers Paint
2005 cbr600rr forks/triple/front rotors-Forks by Hordpower-Rotors by Quality
Ohlins cbr900 shock 1300lb spring -valved by Traxxion
Beringer calipers and perches
ZX636 radiator and seat-recover and foam by Sargent
2005 cbr rear master cylinder
Masanski's brake
hanger/rear rotor lightened
Ducati modified spindle/Carozzeria wheels
SS brakelines SS hardware&probolt throughout
Delkevic slip-on/M4 R/R headers
Rizoma superbike bars and HRC mount

Gilles tooling rearsets on custom plates
Custom harness by PdubHawk/H2O bottle overflow
Plastic oval plates by DC Plastics

Koso tach w/h2o temp
Starlane GPS Laptimer w/Data acquisition capability Every other part -subbie to spacers-I made myself.
JD cooked up the engine.
85+ hp-billet crank

Ti Carrillos-Ti valve train-RR heads cooling
Close-ratio tranny 17/42 gearing
every trick in the book
All riding on Dunlop Q2s.Push-button 320lb/85 hp racer,ala BTT.


NT696's Hawk
Mods:
F2 front end with O/S floating rotors (EBC), and a Hawk front fender.
VFR rear rim modified to attach like stock.
Under-engine can made by me, TBR wrapped headers, -no 'Y' pipe.
Pod filters, 153 cams, head work by JD; oversize SS intake valves, ported intakes, 82mm pistons, balanced crank.
Heated handgrips, Modern headlight assembly with power relays & custom mount. GPS power
Signal eliminator (thanks Doug!) and rear brake line through the swingarm.
Gino's chain roller (an awesome product) and a Corbin seat (over-rated)
I ride it, - a lot. Coming up on 100,000km
Of course, frame sliders, aluminum engine spacers, rear brake torsion arm, and other goodies I make. (I test them all on my bike first)


Socal31's Hawk
Mods:
Fox Shock
Racetech Springs
TBR Shorty Exhaust
NT696 Sliders
SS Brake Lines
Lotsa new stuff


Friday, June 1, 2012

Rust Buster...

Like I've mentioned before, I'm on a budget. During the time I was dismantling my Hawkster, there were several keys parts that needed special attention. What I mean is... they had some surface rust that needed to be removed. So after countless hours on the internet trying to find the perfect product that will help save me on some Benjamin's. This is what I found...

 You can find this product for around $26 - $30 per gallon. They have smaller sizes as well.

The best part of this product is, its not some type of acid which can burn your skin. Instead, its non-corrosive and reusable... read label for more details. 

The first part that I experimented this product on was my chain. Replacing a chain can cost you more than $80. My chain is a DID 520 Racing chain, which normally cost between $110-130. This will surely save my empty pockets from going any deeper. 

 Before - The condition of my rusted chain... 

 After - Soaking in Evapo-Rust for one hour, rust is almost completely gone... 
I ended up soaking it for a few more hours.

Final - All oiled up and ready to be reinstalled. 

Overall, I've used this product on bolts, pipes and anything that has rust on it. I'm pretty happy with the results. So far the money I invested in Evapo-Rust has already saved me a bundle on my Hawkster project.